2. With five sheets at a time cut the top and right sides of the papers.
3. Arrange them from bottom to top as shown in the first page of the pattern.
4. Tape papers together at edges.
5. Cut out pieces.
6. If you want to make a dress that looks more like the modcloth version I showed earlier, tape a piece of paper onto the front bodice piece.
If you are using the original burdastyle pattern simply place your pattern pieces on your fabric and cut out. Be sure to place the front bodice on the fold as well as the front facing and front neckline pieces. Then you are done for the day.
If you are altering your pattern move on to step 7.
7. Measure up about 2" from the original neckline.
8. Measure an inch down from the top point.
9. Draw a slightly curved line between the two points.
10. Draw another slightly curved line between the underarm seam and the new point.
11. Make a point 2" above the waistline. The waistline point should be marked on your front bodice piece. I had already cut my bodice in half when I took this picture so ignore that fact. You will be cutting it later.
12. Measure about 6.5" down from the underarm point.
13. Draw a slightly curved line between the two points.
14. Measure about 5/8" down from the line you just made and make another curved line just below the one you just made.
15. Cut across the line.
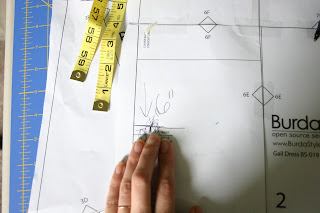
16. I also shortened the length of the skirt piece by 6". To do this I made a point 6" from the bottom of the right side of the front skirt piece.
17. I then made a measurement 4" from the bottom of the left side of the front skirt piece.
18. I then connected the two lines with a slight curve.
19. Measure how long the left side seam is on your front bodice piece and take that measurement and apply it to the right side seam of the back bodice piece. Make a mark.
20. Measure about 6" down from the left side of the back bodice piece.
21. Draw a line between the two measurements.
22. Cut along the line.
23. To shorten the skirt piece, measure the left side of your front skirt piece and apply that measurement to the right side of your back skirt piece.
24. Measure about 18" down from the left side of the back skirt piece.
25. Draw a line between the two measurements.
26. Now take your front facing piece and place it behind your front bodice piece matching lines.
27. Trace where you made the cut on your facing.
28. Put your pieces on your fabric and cut out. Then place your facing pieces on your facing fabric liner and cut out. You can use the same fabric as your dress for you facing if you don't have any liner.
DONE for today! If you are altering your pattern to look more like the modcloth version don't cut out your top and back neckline pieces until later.
And please link to this Frock by Friday with this button!


 Like not spending money?
4 {comments}:
I can't wait to see how this all turns out. thanks for all of the inspiration and talent.
Would it be possible to use the neckline from the original Gail but do the elastic waist from the Modcloth version? I'm still trying to picture it in my mind, so I haven't decided if it would look good. If I did this, where would I cut the bodice front and back for the waist?
Thanks! I love Frock by Friday!!
kellylearnstosew,
absolutely!
Just measure two inches above the waistline mark like before and draw a very slightly curving line to the other side. Basically, just follow the same instructions as I made in monday's post.
Great! I'll give it a try.
Post a Comment