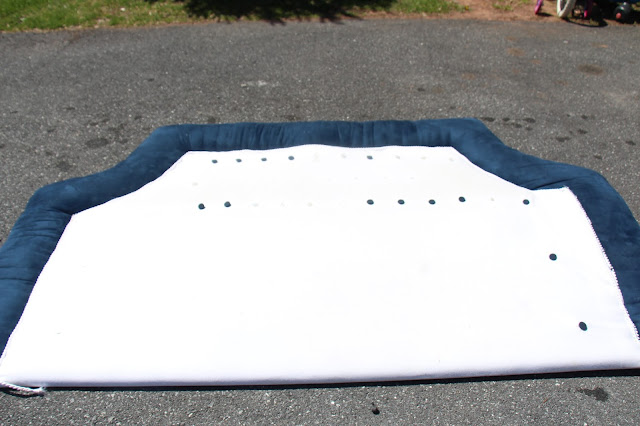
I bought the materials to make this headboard months ago. So I guess it's only fitting that when I actually put my mind to do it that it only took me a day.
I did work for about 7 hours with a lunch break in between which seems like a marathon project but part of the reason it took that long was because I took apart our old headboard to recycle the foam.
You really have to spread out for this project which was part of the reason why I procrastinated until now. I wanted to wait until we had some warm, non-windy, weather so I could do it in our driveway unencumbered. I'm actually glad I did because working with the two headboards I needed about a 20'x20' space.
Since I recycled the foam and batting this project this project only cost me: $63 Compared to the cost of a retail velvet wingback headboard between that's quite a deal! Here's the breakdown:
Nailhead trim: $13 (with coupon)
Fabric: $33
2x4x8: $4
Materials
3 yards of velvet fabric 50+" wide
1/8" thick plywood cut 77"x39" (utility panel is the cheapest)
1x 8' long 2"x4" cut in half
1" foam
batting
5 yards of nailhead trim in gold
51 buttons
0.5625 staples and staple gun
4 corner braces
This was my old headboard. It had seen better days. The first time I made a headboard I used the entire piece of plywood which made it incredibly heavy. This time I had the hardware store cut the piece down to 82"x39". Though I would recommend cutting 77"x39" instead since mine was a little too wide.
So you see here I took off all the batting, foam and fabric. I discarded the fabric and wood board but if I was being super thrifty I should have just cut my original wood down to size. Oh well.
Here, I transferred the foam to the new piece of wood.
Then I added my batting over top and stapled everything down at the corners. I only used a light layer of batting because I was going to use my staple gun to make the tufts and I wanted the staples to piece the whole way through the foam and plywood.
Then I covered everything with my velvet fabric and cut off the excess.
I stapled the fabric to the back of the headboard and the sides stretching the fabric as I went.
Here's what it looked like after I was done.
Then I marked out where I would be putting my tufts. It might be hard to see because I used red marker in case I made mistakes. But I spaced them 8" apart horizontally and 4" apart vertically, staggering them between rows.
Next I used my staple gun to staple where I marked the tufts. I stapled both vertically and horizontally at each mark. This is kind of the lazy way to make a headboard but as long as the staples go through to the back and bend inward you should be okay. See next pic for reference.
See how the staples bend together to catch the plywood. To do this I had to hammer them inward that way.
Now cover your 2x4 with batting. Staple in place ONLY on one side.
Staple your velvet on ONE short side only. Have it drape over the side that you stapled your batting down.
Take two of your corner braces and attach them to the backside of your headboard on either side. Leave 2" of space to place your 2x4 in between. See pic below for reference.
Now place your 2x4 in the bracket and secure with screws. Now fold over your batting and fabric over the brackets.
And staple to the back of headboard pulling tightly.
Now add your nailhead trim along either side of wing edges. Then hot glue on your buttons and you are done!


 Like not spending money?
3 {comments}:
Wow
Just love the colour of the headboard
the 7 hours work is worth it
Sarina
sewguide.com
how did you install the headboard onto your bed or is it then nailed to your wall?
@Aimy TranIt just stands on the two 2"x4"s. Not nailed:-) Hope that helps!
Post a Comment